正在加载图片...
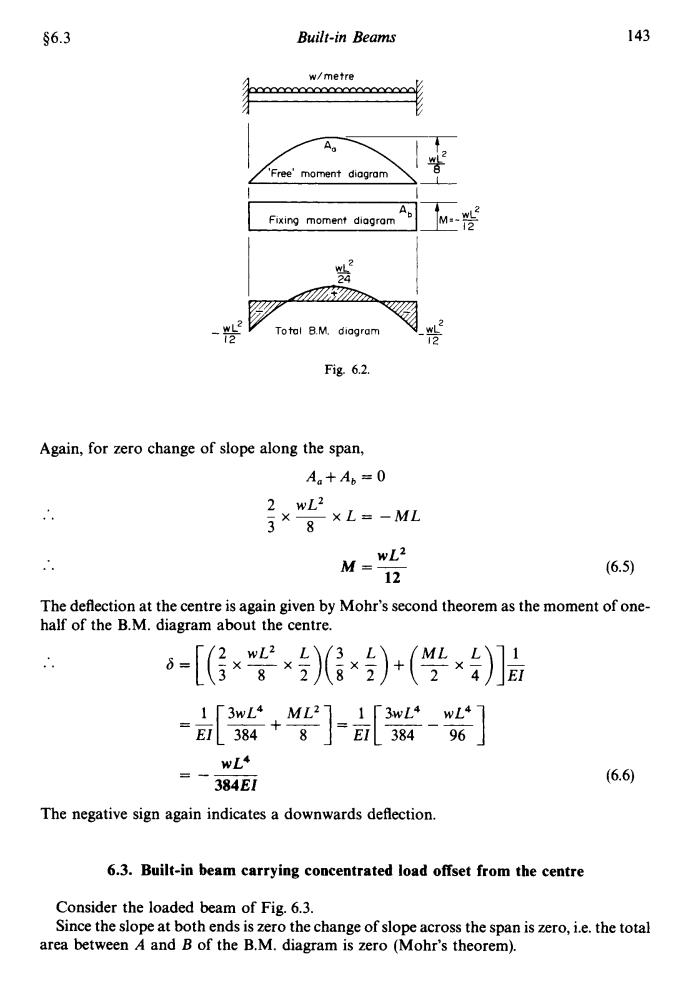
§6.3 Built-in Beams 143 w/metre A 'Free'moment diagram Ap Fixing moment diagram Total B.M.diagram 12 12 Fig.6.2. Again,for zero change of slope along the span, A。+Ab=0 2.wL2 x8×L=-ML 3 M= L2 12 (6.5) The deflection at the centre is again given by Mohr's second theorem as the moment of one- half of the B.M.diagram about the centre. -[(眉ד答)层*)+(些)]日 +]-站] wL+ 384E1 (6.6) The negative sign again indicates a downwards deflection. 6.3.Built-in beam carrying concentrated load offset from the centre Consider the loaded beam of Fig.6.3. Since the slope at both ends is zero the change of slope across the span is zero,i.e.the total area between A and B of the B.M.diagram is zero (Mohr's theorem).$6.3 Built-in Beams 143 'Free' moment diagram I I Fixing moment diagram Ab1Z-d 12 I I Fig. 6.2. Again, for zero change of slope along the span, &+A, = 0 .. 2 WL2 -x- xL=-ML 38 The deflection at the centre is again given by Mohr's second theorem as the moment of onehalf of the B.M. diagram about the centre. .. 6 = [ (3 x $ x ;)(; x ;)+ (y x $)]A EI wL4 384 E I The negative sign again indicates a downwards deflection. - - -- 6.3. Built-in beam carrying concentrated load offset from the centre Consider the loaded beam of Fig. 6.3. Since the slope at both ends is zero the change of slope across the span is zero, i.e. the total area between A and B of the B.M. diagram is zero (Mohr's theorem)