正在加载图片...

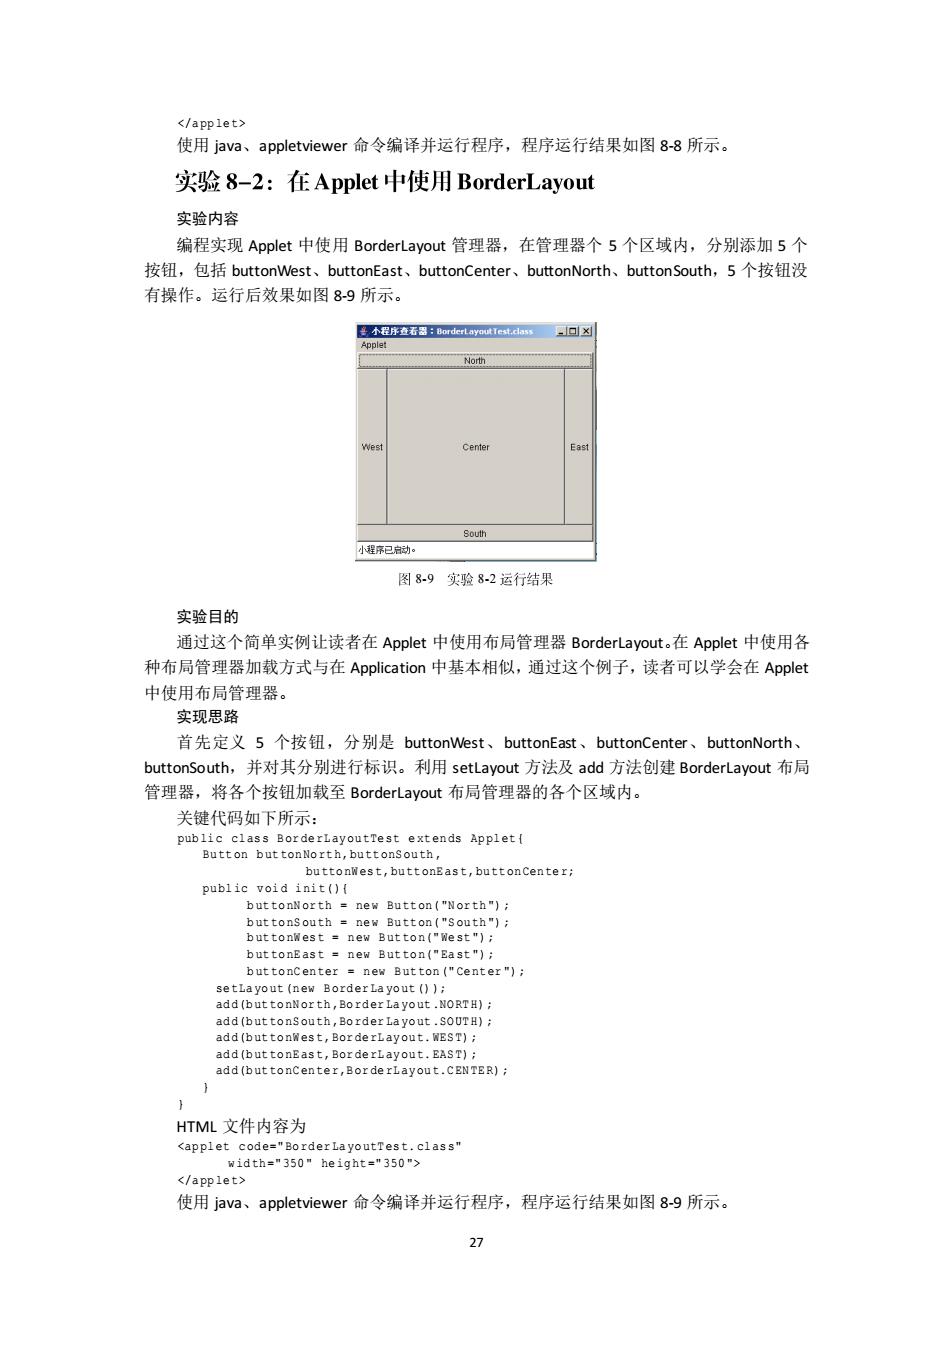
</appiet> 使用java、appletviewer命令编译并运行程序,程序运行结果如图8-8所示。 实验8-2:在Applet中使用BorderLayout 实验内容 编程实现Applet中使用BorderLayout管理器,在管理器个5个区域内,分别添加5个 按 ,包括button est、buttonEast、buttonCenter、buttonNorth、buttonSouth,5个按钮没 有操作。运行后效果如图8-9所示。 小序已动, 图89实验82运行结果 实验目的 通过这个简单实例让读者在Applet中使用布局管理器BorderLayout.在Applet中使用各 种布局管理器加载方式与在Application中基本相似,通过这个例子,读者可以学会在Applet 中使用布局管理器 实现思路 首先定义5个按钮,分别是buttonWest、buttonEast、buttonCenter、buttonNorth、 buttonSouth,.并对其分别进行标识。利用setLayout方法及add方法创建BorderLayout布局 管理器,将各个按钮加载至BorderLayout布局管理器的各个区域内。 关健代如下所示 Button buttonNo :extenda的Applet st, new Button("North") new Butto n("Center"): rde dd (but tongast 文件内容为 erLa 使用java、appletviewer命令编译并运行程序,程序运行结果如图8-9所示27 </a pp le t> 使用 java、appletviewer 命令编译并运行程序,程序运行结果如图 8-8 所示。 实验内容 编程实现 Applet 中使用 BorderLayout 管理器,在管理器个 5 个区域内,分别添加 5 个 按钮,包括 buttonWest、buttonEast、buttonCenter、buttonNorth、buttonSouth,5 个按钮没 有操作。运行后效果如图 8-9 所示。 8-9 8-2 实验目的 通过这个简单实例让读者在 Applet 中使用布局管理器 BorderLayout。在 Applet 中使用各 种布局管理器加载方式与在 Application 中基本相似,通过这个例子,读者可以学会在 Applet 中使用布局管理器。 实现思路 首先定义 5 个按钮,分别是 buttonWest、buttonEast、buttonCenter、buttonNorth、 buttonSouth,并对其分别进行标识。利用 setLayout 方法及 add 方法创建 BorderLayout 布局 管理器,将各个按钮加载至 BorderLayout 布局管理器的各个区域内。 关键代码如下所示: pub li c cl as s B or de rL ay ou tTe st e xt en ds Ap pl et { Bu tt on b ut ton No rt h, bu tt onS ou th , bu tto nW es t, bu tt onE as t, bu tt on Cen te r; pu bl ic v oi d i ni t( ){ b ut to nN or th = ne w Bu tt on( "N or th ") ; b ut to nS ou th = ne w Bu tt on( "S ou th ") ; b ut to nW es t = n ew B ut to n(" We st ") ; b ut to nE as t = n ew B ut to n(" Ea st ") ; b ut to nC en ter = n ew B ut ton (" Ce nt er ") ; se tLa yo ut (n ew B ord er La yo ut () ); ad d(b ut to nN or th ,Bo rd er La yo ut .NO RT H) ; ad d(b ut to nS ou th ,Bo rd er La yo ut .SO UT H) ; ad d(b ut to nW es t, Bor de rL ay ou t. WES T) ; ad d(b ut to nE as t, Bor de rL ay ou t. EAS T) ; ad d(b ut to nC en te r,B or de rL ay ou t.C EN TE R) ; } } HTML 文件内容为 <ap pl et c od e=" Bo rd er La yo utT es t. cl as s" w id th =" 350 " he ig ht =" 350 "> </a pp le t> 使用 java、appletviewer 命令编译并运行程序,程序运行结果如图 8-9 所示