正在加载图片...
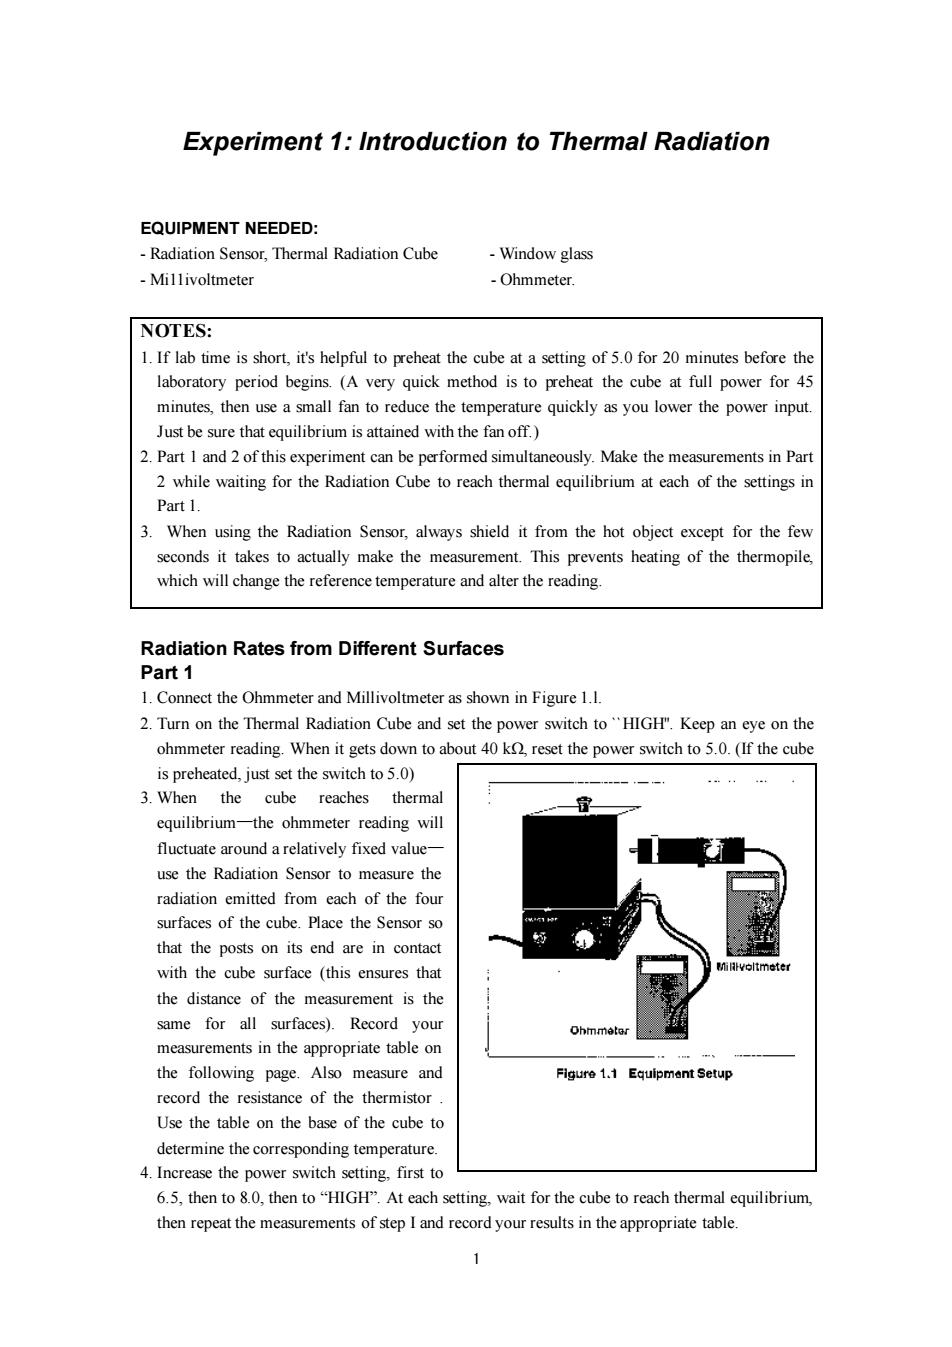
Experiment 1:Introduction to Thermal Radiation EQUIPMENT NEEDED: -Radiation Sensor,Thermal Radiation Cube -Window glass -Millivoltmeter -Ohmmeter. NOTES: 1.If lab time is short,it's helpful to preheat the cube at a setting of 5.0 for 20 minutes before the laboratory period begins.(A very quick method is to preheat the cube at full power for 45 minutes,then use a small fan to reduce the temperature quickly as you lower the power input. Just be sure that equilibrium is attained with the fan off.) 2.Part I and 2 of this experiment can be performed simultaneously.Make the measurements in Part 2 while waiting for the Radiation Cube to reach thermal equilibrium at each of the settings in Part 1. 3.When using the Radiation Sensor,always shield it from the hot object except for the few seconds it takes to actually make the measurement.This prevents heating of the thermopile, which will change the reference temperature and alter the reading. Radiation Rates from Different Surfaces Part 1 1.Connect the Ohmmeter and Millivoltmeter as shown in Figure 1.1. 2.Turn on the Thermal Radiation Cube and set the power switch to"HIGH".Keep an eye on the ohmmeter reading.When it gets down to about 40 k,reset the power switch to 5.0.(If the cube is preheated,just set the switch to 5.0) 3.When the cube reaches thermal equilibrium-the ohmmeter reading will fluctuate around a relatively fixed value- use the Radiation Sensor to measure the radiation emitted from each of the four surfaces of the cube.Place the Sensor so that the posts on its end are in contact with the cube surface (this ensures that Milvoltmeter the distance of the measurement is the same for all surfaces).Record your measurements in the appropriate table on the following page.Also measure and Figure 1.1 Equipmant Setup record the resistance of the thermistor. Use the table on the base of the cube to determine the corresponding temperature. 4.Increase the power switch setting,first to 6.5,then to 8.0,then to"HIGH".At each setting,wait for the cube to reach thermal equilibrium, then repeat the measurements of step I and record your results in the appropriate table.1 Experiment 1: Introduction to Thermal Radiation EQUIPMENT NEEDED: - Radiation Sensor, Thermal Radiation Cube - Window glass - Mi11ivoltmeter - Ohmmeter. NOTES: 1. If lab time is short, it's helpful to preheat the cube at a setting of 5.0 for 20 minutes before the laboratory period begins. (A very quick method is to preheat the cube at full power for 45 minutes, then use a small fan to reduce the temperature quickly as you lower the power input. Just be sure that equilibrium is attained with the fan off.) 2. Part 1 and 2 of this experiment can be performed simultaneously. Make the measurements in Part 2 while waiting for the Radiation Cube to reach thermal equilibrium at each of the settings in Part 1. 3. When using the Radiation Sensor, always shield it from the hot object except for the few seconds it takes to actually make the measurement. This prevents heating of the thermopile, which will change the reference temperature and alter the reading. Radiation Rates from Different Surfaces Part 1 1. Connect the Ohmmeter and Millivoltmeter as shown in Figure 1.l. 2. Turn on the Thermal Radiation Cube and set the power switch to ``HIGH''. Keep an eye on the ohmmeter reading. When it gets down to about 40 kΩ, reset the power switch to 5.0. (If the cube is preheated, just set the switch to 5.0) 3. When the cube reaches thermal equilibrium—the ohmmeter reading will fluctuate around a relatively fixed value— use the Radiation Sensor to measure the radiation emitted from each of the four surfaces of the cube. Place the Sensor so that the posts on its end are in contact with the cube surface (this ensures that the distance of the measurement is the same for all surfaces). Record your measurements in the appropriate table on the following page. Also measure and record the resistance of the thermistor . Use the table on the base of the cube to determine the corresponding temperature. 4. Increase the power switch setting, first to 6.5, then to 8.0, then to “HIGH”. At each setting, wait for the cube to reach thermal equilibrium, then repeat the measurements of step I and record your results in the appropriate table