正在加载图片...

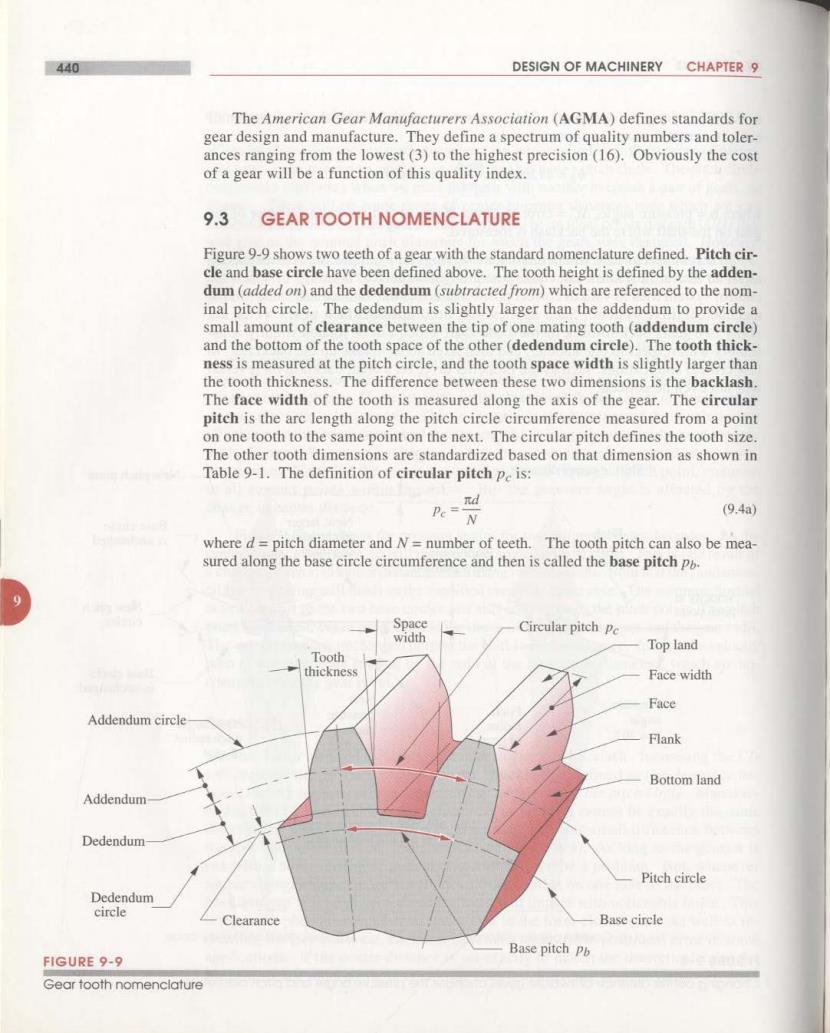
440 DESIGN OF MACHINERY CHAPTER 9 The American Gear Manufacturers Association (AGMA)defines standards for gear design and manufacture.They define a spectrum of quality numbers and toler- ances ranging from the lowest(3)to the highest precision (16).Obviously the cost of a gear will be a function of this quality index. 9.3 GEAR TOOTH NOMENCLATURE Figure 9-9 shows two teeth of a gear with the standard nomenclature defined.Pitch cir- cle and base circle have been defined above.The tooth height is defined by the adden- dum (added on)and the dedendum (subtracted from)which are referenced to the nom- inal pitch circle.The dedendum is slightly larger than the addendum to provide a small amount of clearance between the tip of one mating tooth(addendum circle) and the bottom of the tooth space of the other(dedendum circle).The tooth thick- ness is measured at the pitch circle,and the tooth space width is slightly larger than the tooth thickness.The difference between these two dimensions is the backlash. The face width of the tooth is measured along the axis of the gear.The circular pitch is the arc length along the pitch circle circumference measured from a point on one tooth to the same point on the next.The circular pitch defines the tooth size. The other tooth dimensions are standardized based on that dimension as shown in Table 9-1.The definition of circular pitch pe is: 么s N (9.4a) where d=pitch diameter and N=number of teeth.The tooth pitch can also be mea- sured along the base circle circumference and then is called the base pitch po. Space Circular pitch Pe width Top land Tooth thickness Face width Face Addendum circle Flank Bottom land Addendum Dedendum Pitch circle Dedendum circle Clearance Base circle Base pitch ph FIGURE 9-9 Gear tooth nomenclature